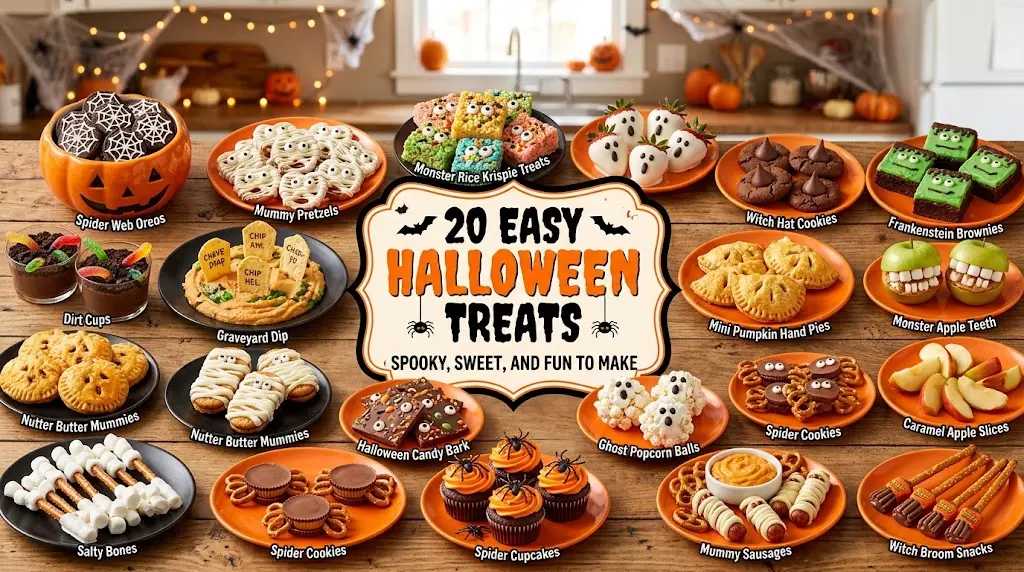
20 Easy Halloween Treats That Are Spooky, Sweet, and Fun to Make
Halloween is the perfect excuse to turn everyday sweets into something spooky, colorful, and fun. Whether you’re preparing snacks for a classroom party, planning a family movie night, hosting a Halloween gathering, or putting together a festive dessert table, these easy Halloween treats offer plenty of inspiration without requiring complicated baking skills.
From chocolate-dipped ghost strawberries and mummy cookies to monster brownies and creepy-crawly pudding cups, these recipes use familiar ingredients and simple decorating techniques. Many can be made with store-bought cookies, pretzels, marshmallows, chocolate chips, and candy eyes, making them convenient choices when you’re short on time.
You’ll find a mix of no-bake desserts, quick party snacks, and oven-baked favorites, so there’s something for different ages and skill levels. Each idea includes an ingredient list, clear instructions, and practical tips to help you prepare treats that look festive and taste delicious.
Grab your favorite Halloween sprinkles and get ready to make a batch of spooky sweets everyone will enjoy!
1. Chocolate-Dipped Ghost Strawberries
These adorable ghost strawberries are a great choice when you want a Halloween dessert that looks impressive but requires very little effort. Fresh strawberries are dipped in white chocolate and decorated with tiny chocolate faces. They’re perfect for Halloween parties, dessert platters, and family celebrations.
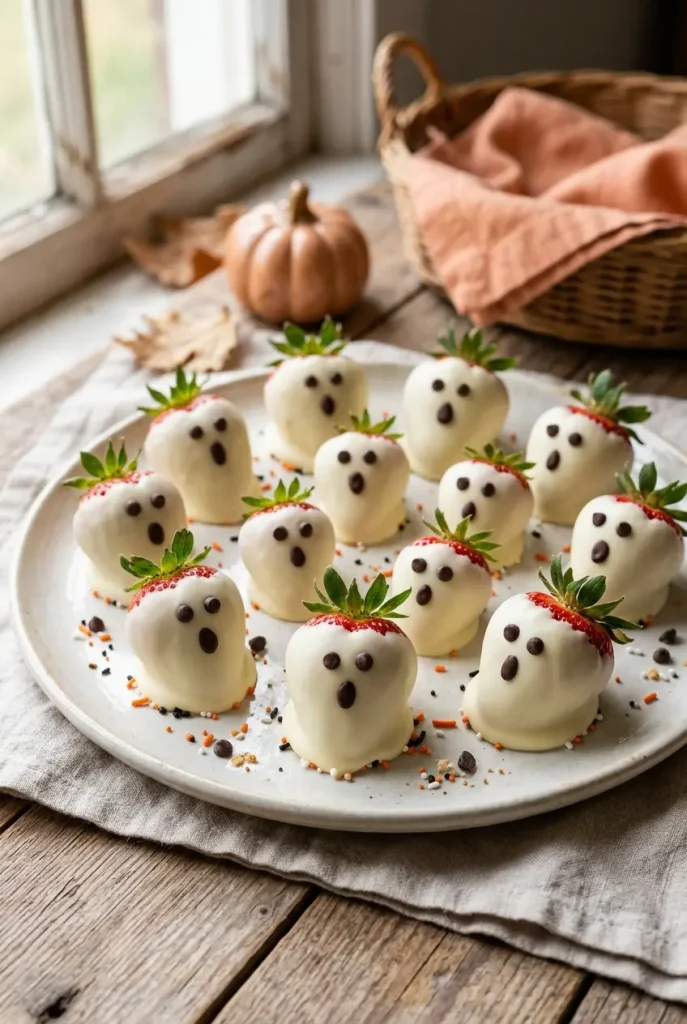
Prep time: 15 minutes Chilling time: 15–20 minutes Makes: 12 strawberries
Ingredients
- 12 fresh strawberries
- 8 ounces white chocolate melting wafers
- 24 mini chocolate chips or candy eyes
- 1 teaspoon coconut oil, optional, if needed for smoother melting
How to Make
- Wash the strawberries thoroughly and dry them completely. Leave the green tops attached so you can hold them while dipping.
- Melt the white chocolate wafers according to the package instructions, using short microwave intervals and stirring between each one.
- Hold each strawberry by its stem and dip it into the melted chocolate. Allow excess chocolate to drip off.
- Place the strawberries on parchment paper and gently pull a little chocolate outward at the bottom to create a ghost-like shape.
- Add mini chocolate chips for eyes and a mouth while the coating is still soft.
- Refrigerate until the chocolate sets, then arrange the ghosts on a serving plate.
Tips for Success
- Make sure the strawberries are completely dry to prevent the chocolate from slipping.
- Use candy eyes for a playful look or mini chocolate chips for simple ghost faces.
- Keep refrigerated and serve the same day for the best texture.
- For a dairy-free version, use suitable dairy-free white chocolate.
2. Halloween Mummy Brownies
Turn a batch of fudgy brownies into spooky little mummies with white chocolate drizzle and candy eyes. This is an easy way to dress up homemade brownies or a boxed brownie mix without needing special decorating skills.
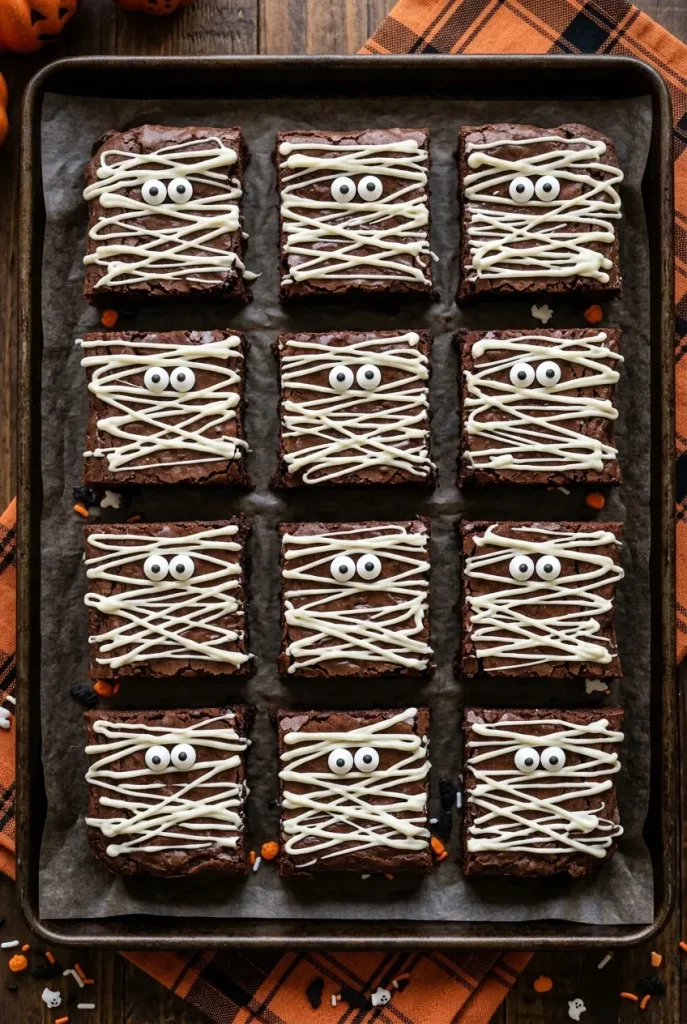
Prep time: 15 minutes Baking time: 20–30 minutes, depending on the recipe Makes: 12 brownies
Ingredients
- 1 box brownie mix, plus ingredients listed on the package
- ½ cup white chocolate melting wafers
- 24 small candy eyes
- Nonstick cooking spray or parchment paper
How to Make
- Preheat the oven to the temperature specified on your brownie mix.
- Prepare the brownie batter according to the package instructions.
- Spread the batter in a lined or greased baking pan and bake as directed.
- Allow the brownies to cool completely before cutting them into 12 squares.
- Melt the white chocolate wafers according to the package instructions.
- Drizzle the chocolate back and forth across each brownie to resemble mummy bandages.
- Add two candy eyes to each brownie before the chocolate hardens.
- Let the decorations set before serving.
Tips for Success
- Cool the brownies completely so the white chocolate doesn’t melt into the surface.
- Use a piping bag or a small zip-top bag with a tiny corner snipped off for neater bandages.
- Slightly uneven chocolate lines make the mummies look more playful.
- Store in an airtight container according to the brownie recipe’s storage guidance.
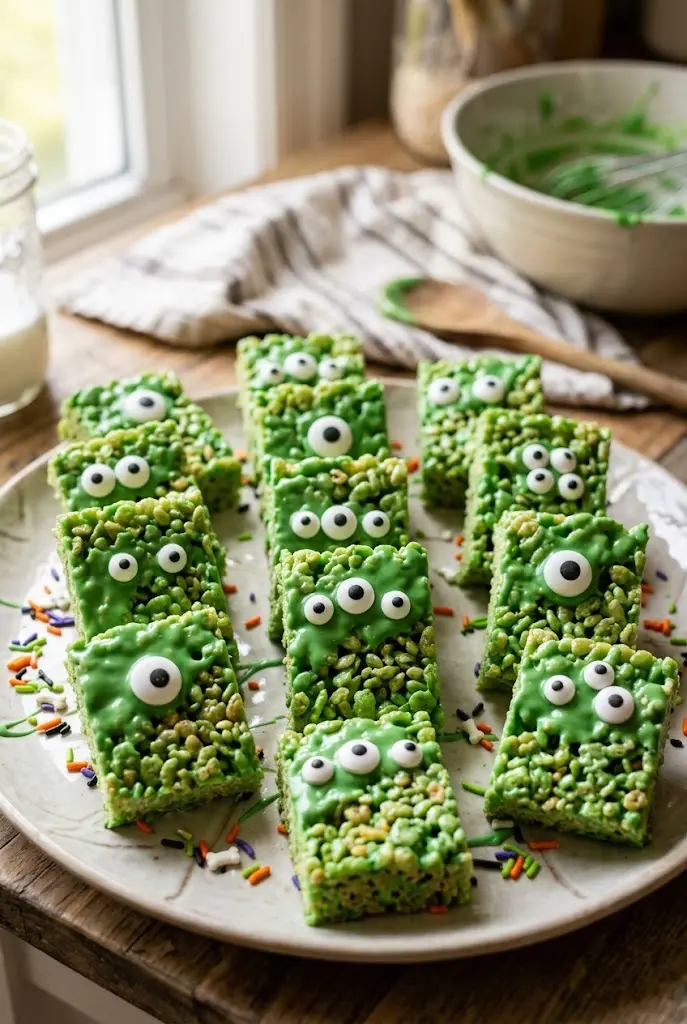
3. Monster Rice Krispie Treats
Rice Krispie treats are a classic no-fuss dessert, and a little green coating transforms them into funny Halloween monsters. Give each one a different expression with candy eyes, sprinkles, and chocolate decorations.
Prep time: 20 minutes Setting time: 20 minutes Makes: 12 treats
Ingredients
- 6 cups crispy rice cereal
- 4 cups mini marshmallows
- 3 tablespoons butter
- Green food coloring, optional
- 8 ounces green candy melts or white candy melts colored with suitable candy coloring
- 24–36 candy eyes
- Halloween sprinkles, optional
How to Make
- Melt the butter in a large saucepan over low heat.
- Add the mini marshmallows and stir until smooth.
- If desired, mix in a small amount of green food coloring.
- Remove from the heat and gently fold in the crispy rice cereal until coated.
- Press the mixture into a greased or parchment-lined pan without packing it too tightly.
- Allow it to cool, then cut into 12 rectangles.
- Melt the candy coating according to its package directions.
- Dip the tops of the treats into the green coating or spread it over the surface.
- Add candy eyes and sprinkles before the coating sets.
Tips for Success
- Grease your spatula lightly to make the sticky mixture easier to handle.
- Avoid pressing the cereal mixture too firmly, which can make the bars dense.
- Give some monsters one eye and others three eyes for variety.
- Let the coating set completely before stacking the treats.
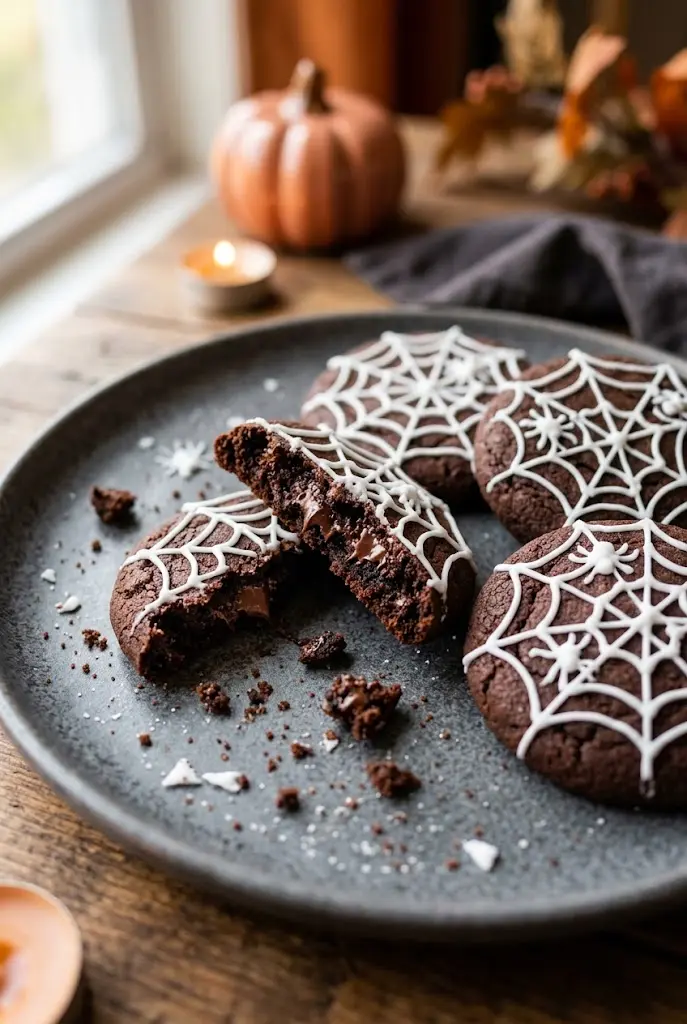
4. Spiderweb Chocolate Cookies
Chocolate cookies with white icing spiderwebs look wonderfully spooky on a Halloween dessert table. The design is simple enough for beginners and works with homemade chocolate cookies or store-bought cookies that have a flat surface.
Prep time: 20 minutes Baking time: 10–12 minutes if baking from scratch Makes: 12 cookies
Ingredients
- 12 baked chocolate cookies, cooled
- ½ cup powdered sugar
- 1–2 tablespoons milk or water
- ¼ teaspoon vanilla extract, optional
- 2 ounces melted white chocolate, optional alternative
How to Make
- Arrange the cooled cookies on a flat tray.
- Mix the powdered sugar with a little milk or water until you have a smooth, pipeable icing.
- Transfer the icing to a piping bag or a zip-top bag with a small corner cut off.
- Pipe three or four thin circles on each cookie.
- Drag a toothpick from the center outward through the circles to create a spiderweb pattern.
- Let the icing dry before serving or packing the cookies.
Tips for Success
- Keep the icing thick enough to hold its shape but thin enough to pipe smoothly.
- Practice the web design on parchment before decorating the cookies.
- Use dark chocolate cookies for strong contrast against the white icing.
- If using melted white chocolate instead of icing, make sure it remains fluid enough to pipe.
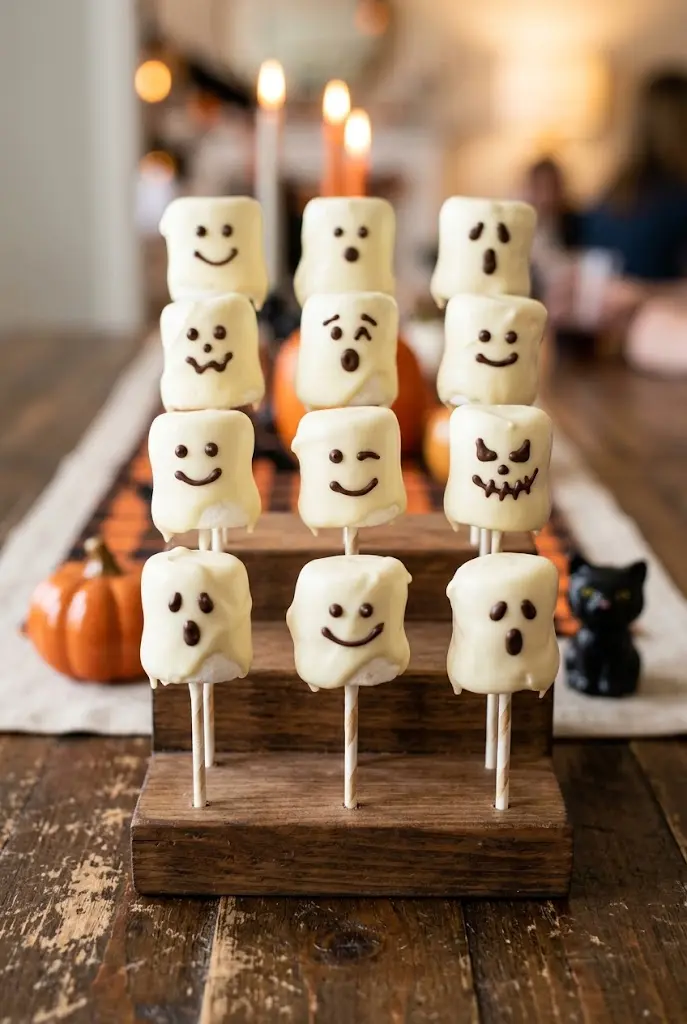
5. Ghost-Shaped Marshmallow Pops
Marshmallow ghost pops are a fun option for Halloween parties because they’re easy to hold, simple to decorate, and require no oven. Dip large marshmallows in white chocolate, add a stick, and give each ghost a face.
Prep time: 20 minutes Setting time: 15 minutes Makes: 12 pops
Ingredients
- 12 large marshmallows
- 8 ounces white chocolate melting wafers
- 12 paper lollipop sticks
- 24 mini chocolate chips or candy eyes
- 1 teaspoon coconut oil, optional
How to Make
- Line a tray with parchment paper.
- Gently insert a lollipop stick into each marshmallow.
- Melt the white chocolate wafers according to the package instructions.
- Dip each marshmallow into the chocolate, rotating it to coat the sides.
- Let excess coating drip off before placing each pop on the lined tray.
- Add eyes and a small mouth while the coating is still soft.
- Allow the pops to set at room temperature if the coating permits, or refrigerate briefly as directed on the package.
Tips for Success
- Twist the sticks gently as you dip to help distribute the coating.
- If the chocolate becomes too thick, warm it briefly and stir.
- Stand the pops upright in a foam block or tall glass while they set if you want a display-style presentation.
- Keep away from excessive heat so the coating doesn’t soften.
6. Halloween Chocolate-Covered Pretzel Rods
Sweet, salty, crunchy, and colorful, chocolate-covered pretzel rods are ideal when you need a treat that can be prepared ahead. The long shape makes them easy to decorate with Halloween-colored chocolate stripes and sprinkles.

Prep time: 20 minutes Setting time: 20 minutes Makes: 12 rods
Ingredients
- 12 pretzel rods
- 8 ounces semi-sweet or milk chocolate melting wafers
- 4 ounces orange or green candy melts
- Halloween sprinkles, as desired
How to Make
- Line a baking sheet with parchment paper.
- Melt the semi-sweet chocolate according to its package instructions.
- Dip each pretzel rod about halfway into the chocolate, leaving a handle at the bottom.
- Gently shake off excess chocolate and place the rods on the parchment.
- Melt the colored candy coating in a separate bowl.
- Drizzle the colored coating across the chocolate-covered portion.
- Add Halloween sprinkles before the coating sets.
- Let the rods harden completely before serving or wrapping.
Tips for Success
- Use a tall, narrow container for dipping if you want a more even coating.
- Leave enough bare pretzel to hold comfortably.
- Mix colors such as orange, purple, and green for a festive assortment.
- Store in an airtight container in a cool, dry place.
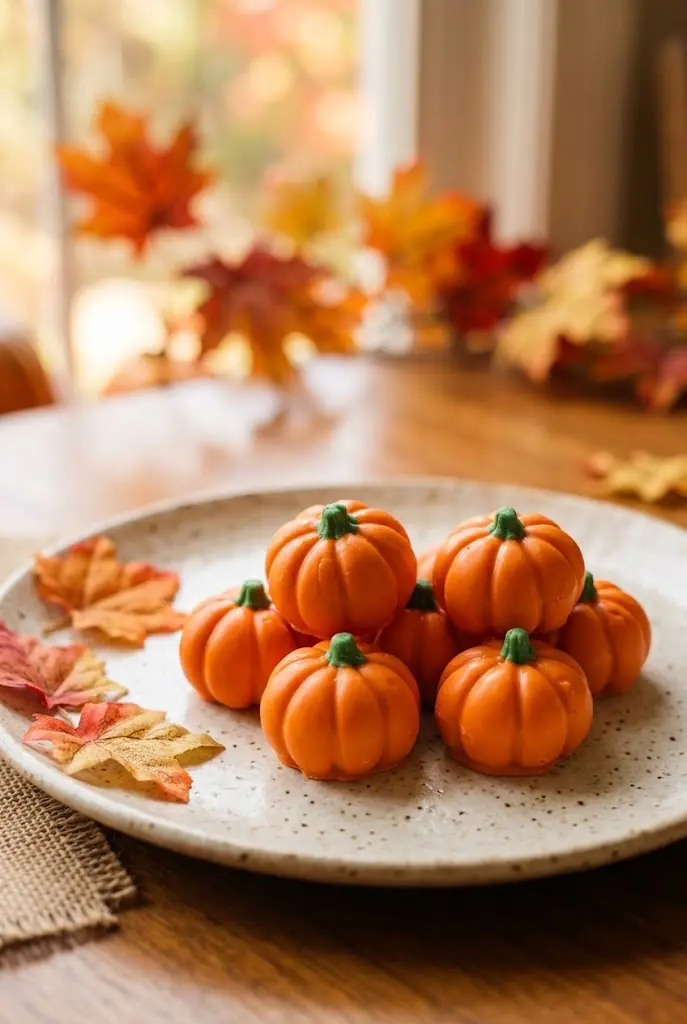
7. Pumpkin-Shaped Peanut Butter Balls
These pumpkin-shaped peanut butter treats combine a creamy, sweet filling with a bright orange candy shell. They look special on a Halloween platter but can be made with basic pantry ingredients and a little shaping.
Prep time: 30 minutes Chilling time: 30–45 minutes Makes: 12–16 pumpkins
Ingredients
- 1 cup creamy peanut butter
- 2 tablespoons softened butter
- 1½ cups powdered sugar, plus more if needed
- 8 ounces orange candy melts
- Green candy melts or small green candy pieces for stems
How to Make
- Mix the peanut butter and softened butter in a bowl until smooth.
- Gradually stir in the powdered sugar until the mixture becomes firm enough to shape.
- Roll the mixture into small balls and gently flatten them into pumpkin shapes.
- Use a toothpick to make shallow vertical grooves along the sides.
- Chill the shapes until firm.
- Melt the orange candy coating according to the package directions.
- Dip each chilled pumpkin into the coating, allowing the excess to drip away.
- Place on parchment paper and add a small green candy stem before the coating sets.
- Allow the coating to harden before serving.
Tips for Success
- Add powdered sugar gradually; too much can make the filling dry.
- Chill the shapes thoroughly to make dipping easier.
- For a nut-free alternative, use a suitable seed butter and check all ingredient labels.
- Because these contain peanut butter, clearly label them for guests with allergies.
8. Monster-Face Sugar Cookies
Monster sugar cookies are perfect for a Halloween baking activity with kids. Start with plain sugar cookies, add colorful frosting, and let everyone invent their own silly monsters using candy eyes, sprinkles, and icing.
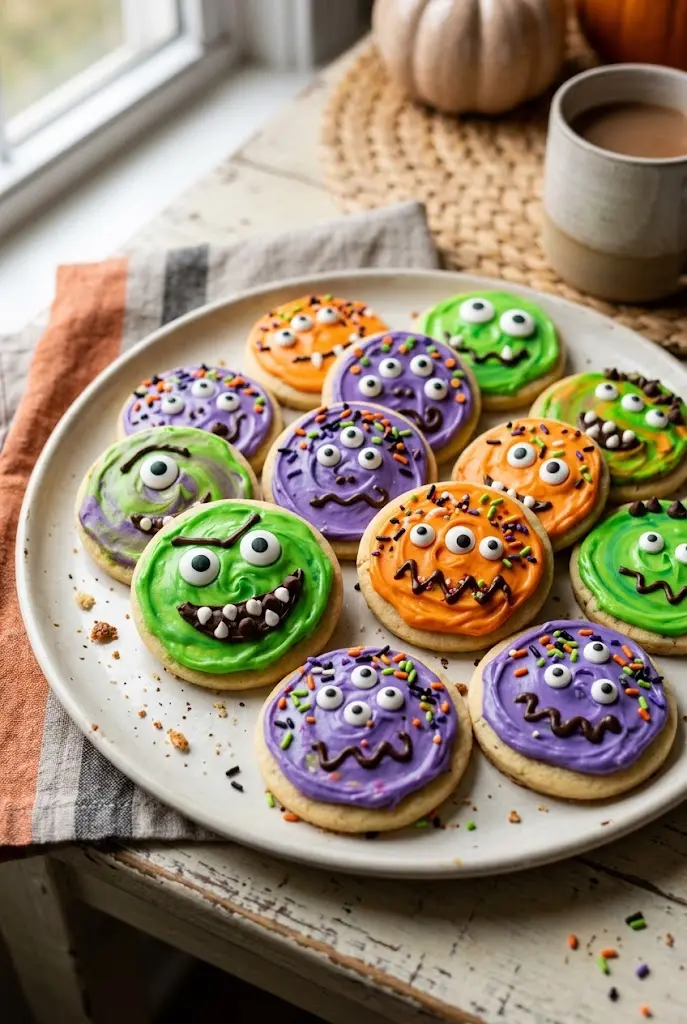
Prep time: 25 minutes Baking time: 8–12 minutes if baking from scratch Makes: 12 cookies
Ingredients
- 12 baked sugar cookies, cooled
- 1 cup prepared vanilla frosting
- Green, purple, and orange food coloring
- 24–36 candy eyes
- Mini chocolate chips, sprinkles, or small candies for decoration
How to Make
- Divide the frosting into three bowls.
- Tint each bowl a different Halloween color.
- Spread or pipe frosting over each cooled cookie.
- Add one, two, or three candy eyes to each cookie.
- Use chocolate chips or sprinkles to make mouths, freckles, horns, or other monster features.
- Allow the frosting to set before arranging the cookies on a tray.
Tips for Success
- Use gel food coloring for more vivid frosting colors without adding much liquid.
- Give children small bowls of decorations so they can design their own monsters.
- If you’re short on time, use store-bought sugar cookies.
- For a party, make a range of expressions rather than identical cookies.
9. Oreo Spider Cookies
Oreo spider cookies are a simple no-bake Halloween treat made with chocolate sandwich cookies, pretzel sticks, and candy eyes. They’re especially useful for school parties and family gatherings because each spider is assembled from familiar ingredients.
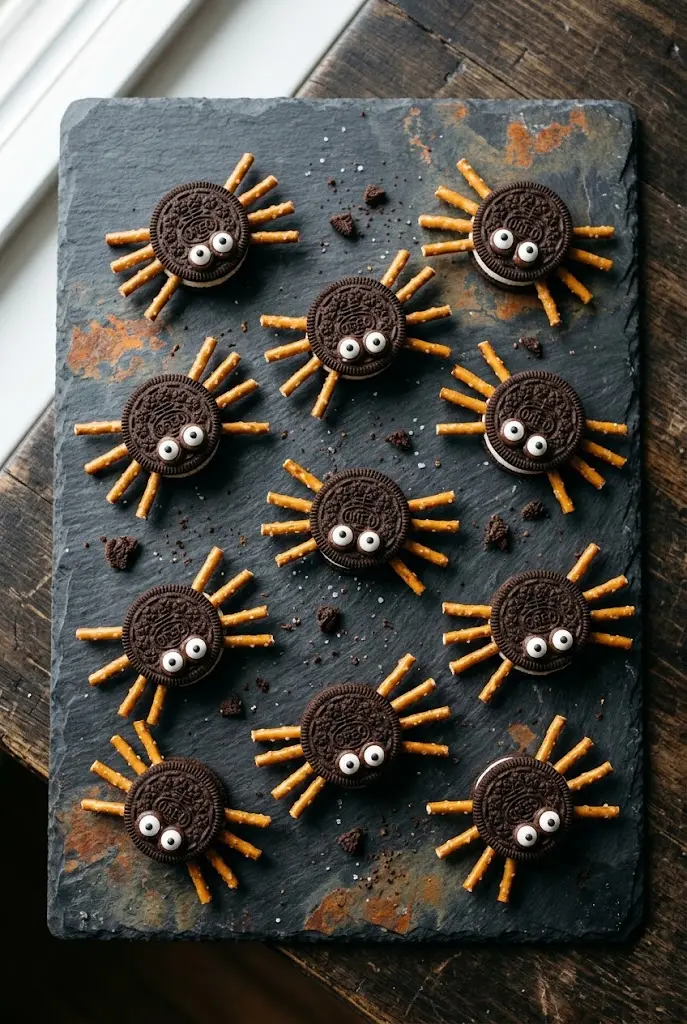
Prep time: 15 minutes Makes: 12 spiders
Ingredients
- 12 chocolate sandwich cookies
- 48 thin pretzel sticks
- 24 candy eyes
- 2 tablespoons melted chocolate, for attaching decorations if needed
How to Make
- Gently twist each sandwich cookie apart.
- Break the pretzel sticks into shorter pieces for spider legs.
- Arrange four pretzel pieces on each side of the cookie filling.
- Press the cookie halves back together carefully to secure the legs.
- Use a small amount of melted chocolate to attach two candy eyes to the top of each spider.
- Let any melted chocolate set before serving.
Tips for Success
- Choose thin pretzel sticks so they resemble delicate spider legs.
- If the cookie filling is too firm to hold the legs, use a little melted chocolate as edible glue.
- Handle the cookies gently to prevent cracking.
- Store in an airtight container in a cool, dry place.
10. Halloween Dirt Pudding Cups
Dirt pudding cups combine creamy chocolate pudding with crushed chocolate cookies to create an edible graveyard-inspired dessert. Serve them in individual clear cups and finish with gummy worms, candy eyes, or small cookie decorations.
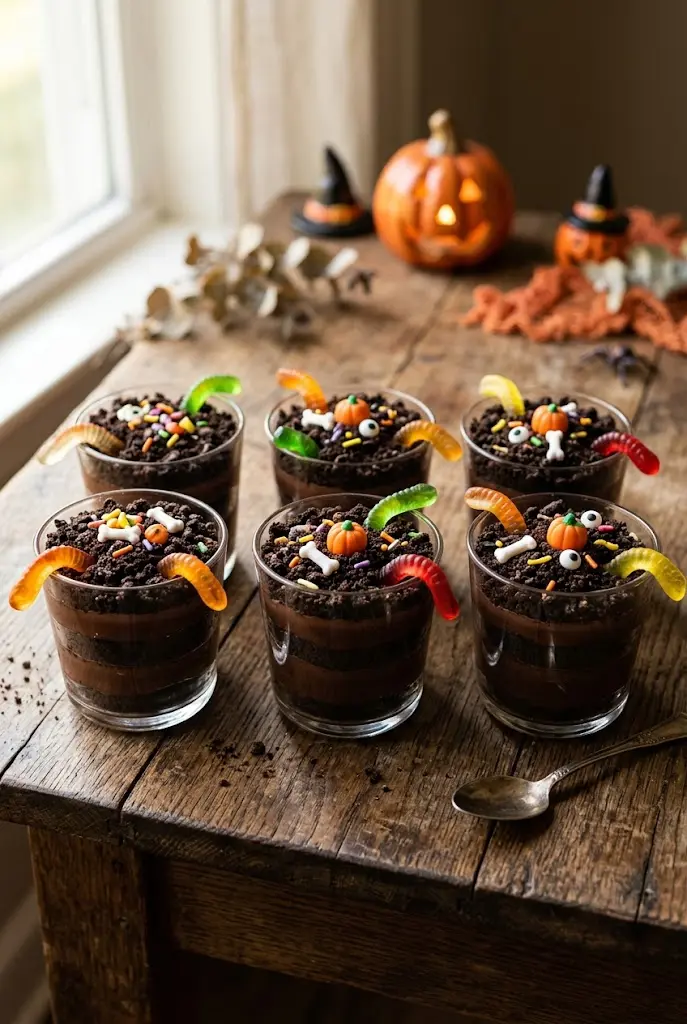
Prep time: 15 minutes Chilling time: 30 minutes, or according to pudding instructions Makes: 6 cups
Ingredients
- 2 cups prepared chocolate pudding, chilled
- 12 chocolate sandwich cookies, crushed
- 1 cup whipped topping, optional
- 12 gummy worms
- 6 small clear dessert cups
How to Make
- Prepare the chocolate pudding according to its package directions and chill it.
- If desired, gently fold some whipped topping into the pudding for a lighter texture.
- Spoon the pudding into six clear cups.
- Sprinkle a generous layer of crushed chocolate cookies over each cup.
- Press one or two gummy worms into the cookie crumbs.
- Chill until serving time.
Tips for Success
- Crush the cookies finely for a soil-like appearance, but leave a few larger crumbs for texture.
- Assemble shortly before serving if you want the topping to stay crunchy.
- Use small cookie tombstones for a graveyard look.
- Keep refrigerated and follow the storage guidance for the pudding and toppings.
11. Mini Halloween Pizza Mummies
Savory option · Great for kids’ parties
Not every Halloween treat needs to be sweet. Mini mummy pizzas are a fun savory addition to a Halloween snack table, using English muffins, pizza sauce, cheese, and olive slices for the eyes.

Prep time: 10 minutes Baking time: 8–10 minutes Makes: 6 mini pizzas
Ingredients
- 3 English muffins, split in half
- ½ cup pizza sauce
- 1 cup shredded mozzarella cheese
- 12 small black olive slices
- ½ teaspoon Italian seasoning, optional
How to Make
- Preheat the oven to 400°F (200°C).
- Place the English muffin halves cut-side up on a baking sheet.
- Spread a thin layer of pizza sauce over each half.
- Arrange strips of mozzarella diagonally across each muffin to resemble mummy bandages.
- Leave a small space near the top for the eyes.
- Add two olive slices to each mini pizza.
- Sprinkle with Italian seasoning if desired.
- Bake for 8–10 minutes, or until the cheese is melted and the edges are lightly toasted.
Tips for Success
- Cut the cheese into thin strips for a clearer mummy effect.
- Avoid adding too much sauce, which can make the muffins soggy.
- Try mini bagels or small pita rounds instead of English muffins.
- Let the pizzas cool slightly before serving to children.
12. Candy Corn Pretzel Bites
These sweet-and-salty pretzel bites borrow the familiar orange, yellow, and white colors of candy corn. They’re simple to assemble and make a colorful addition to a Halloween dessert tray.
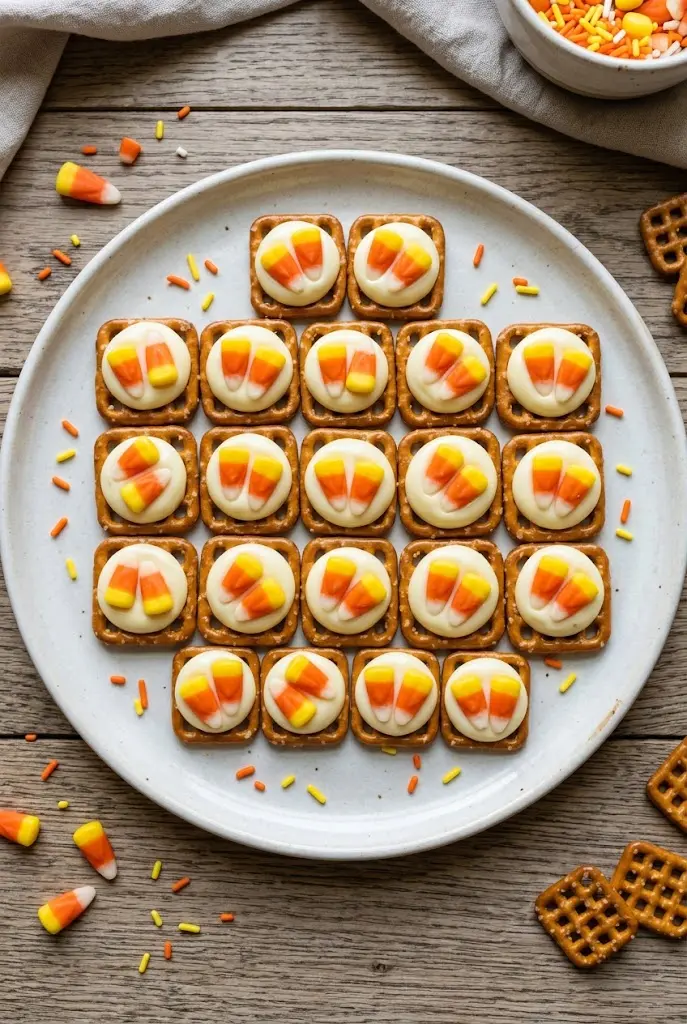
Prep time: 15 minutes Setting time: 15–20 minutes Makes: 24 bites
Ingredients
- 24 small square pretzels
- 24 white chocolate or vanilla candy melts
- 24 candy corn pieces
- 2 tablespoons orange candy melts, optional
- 2 tablespoons yellow candy melts, optional
How to Make
- Preheat the oven to 250°F (120°C).
- Arrange the pretzels in a single layer on a parchment-lined baking sheet.
- Place one white candy melt on each pretzel.
- Warm in the oven for about 3–4 minutes, just until the candy melts soften. Watch carefully.
- Press one candy corn piece gently into the softened coating.
- If desired, drizzle with orange or yellow candy coating for extra color.
- Allow the bites to cool completely until firm.
Tips for Success
- Keep the pretzels in a single layer to make decorating easier.
- Don’t overheat the candy melts, as they can become too soft and lose their shape.
- Use Halloween-colored chocolate candies if candy corn isn’t available.
- Store in an airtight container away from warmth and moisture.
13. Witch Hat Cookies
Witch hat cookies are a classic Halloween party idea that combines chocolate cookies, chocolate kisses, and colorful icing. Their recognizable shape makes them festive without requiring complicated baking or elaborate decorations.
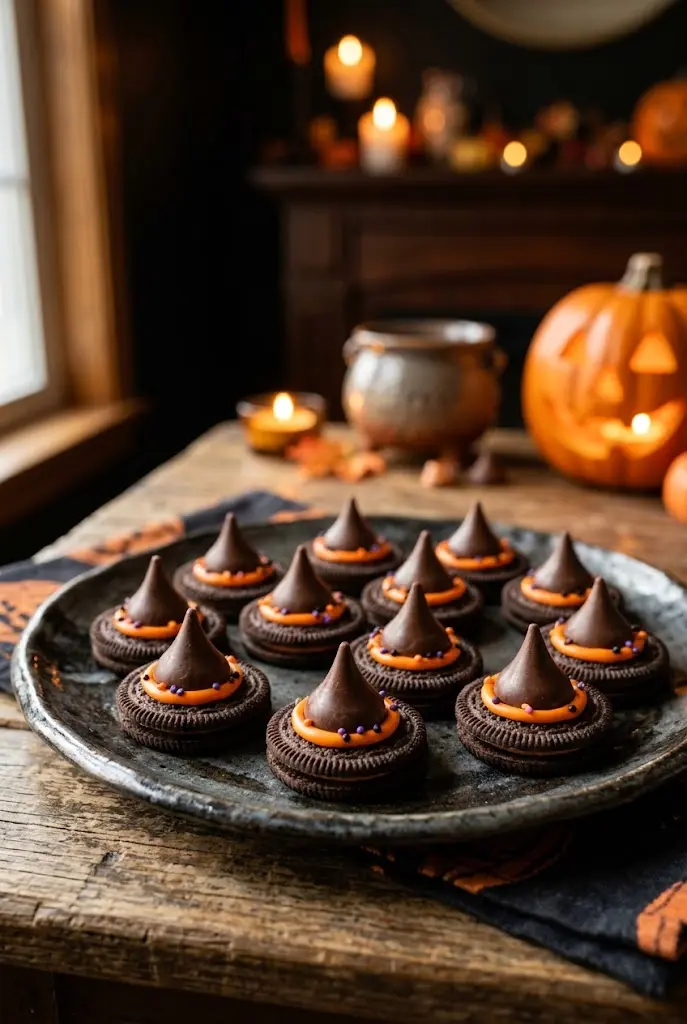
Prep time: 20 minutes Setting time: 15 minutes Makes: 12 cookies
Ingredients
- 12 round chocolate wafer cookies
- 12 chocolate kiss-shaped candies
- ¼ cup orange frosting or decorating icing
- ¼ cup melted chocolate, if needed to attach the candies
- Orange sprinkles, optional
How to Make
- Arrange the chocolate wafer cookies on a tray.
- Place a small dab of frosting or melted chocolate in the center of each cookie.
- Press a chocolate kiss onto the dab to create the pointed crown of the witch’s hat.
- Pipe a thin orange icing ring around the base of each chocolate candy.
- Add orange sprinkles while the icing is still wet, if desired.
- Allow the decorations to set before serving.
Tips for Success
- Use flat, sturdy cookies to help the hats sit evenly.
- If the candies slide, chill the assembled cookies briefly to help the chocolate firm up.
- Try purple or green icing for a different Halloween color scheme.
- Assemble the hats on a flat tray to avoid disturbing the decorations.
14. Halloween Candy Bark
Chocolate bark is one of the easiest Halloween desserts to customize. Spread melted chocolate over a lined tray, add your favorite candies and crunchy toppings, let it set, and break it into irregular pieces.
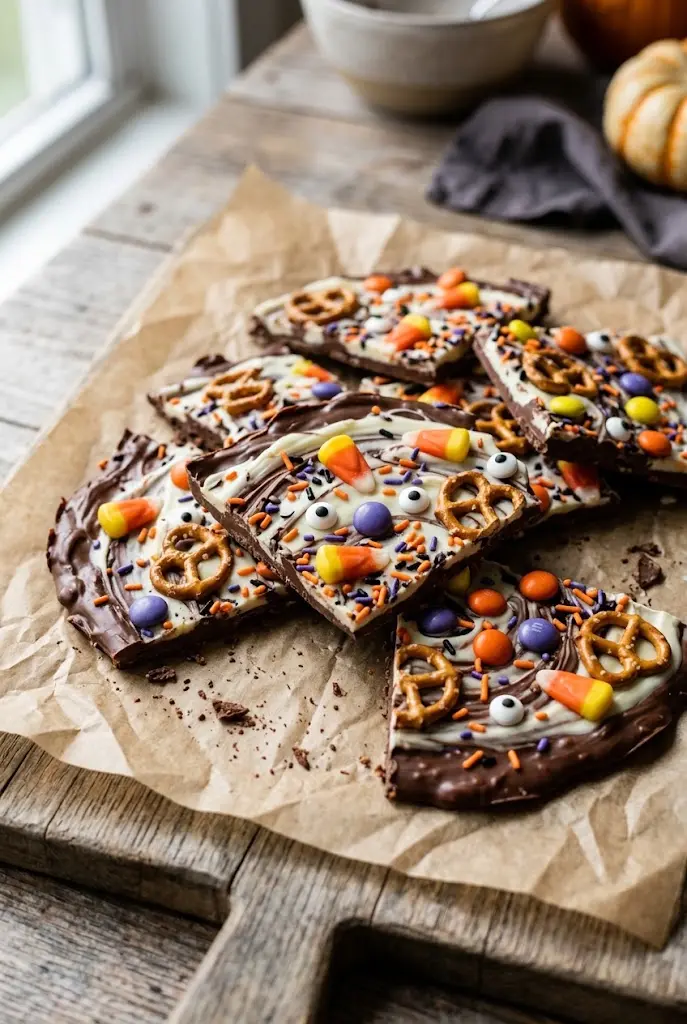
Prep time: 15 minutes Setting time: 30–45 minutes Makes: About 12–16 pieces
Ingredients
- 12 ounces semi-sweet or white chocolate melting wafers
- ½ cup candy corn
- ¼ cup mini pretzels, broken into pieces
- ¼ cup Halloween-colored candy-coated chocolates
- 2 tablespoons Halloween sprinkles
- Candy eyes, optional
How to Make
- Line a baking sheet or small tray with parchment paper.
- Melt the chocolate according to the package directions.
- Spread the melted chocolate into an even layer about ¼ inch thick.
- Sprinkle candy corn, pretzel pieces, candy-coated chocolates, and other decorations over the surface.
- Press larger toppings gently into the chocolate so they adhere.
- Allow the bark to set completely at room temperature or chill briefly if appropriate for the coating.
- Break into irregular pieces and serve.
Tips for Success
- Choose toppings with contrasting colors and textures for a more interesting result.
- Avoid adding wet fruit, which can interfere with the chocolate and shorten storage life.
- Use separate white and dark chocolate layers for a marbled effect.
- Package the bark in treat bags for party favors.
15. Monster Apple Mouths
For a fresher Halloween snack, monster apple mouths combine crisp apple slices with creamy peanut butter and marshmallow teeth. They’re colorful, easy to assemble, and offer a break from the usual chocolate-heavy desserts.
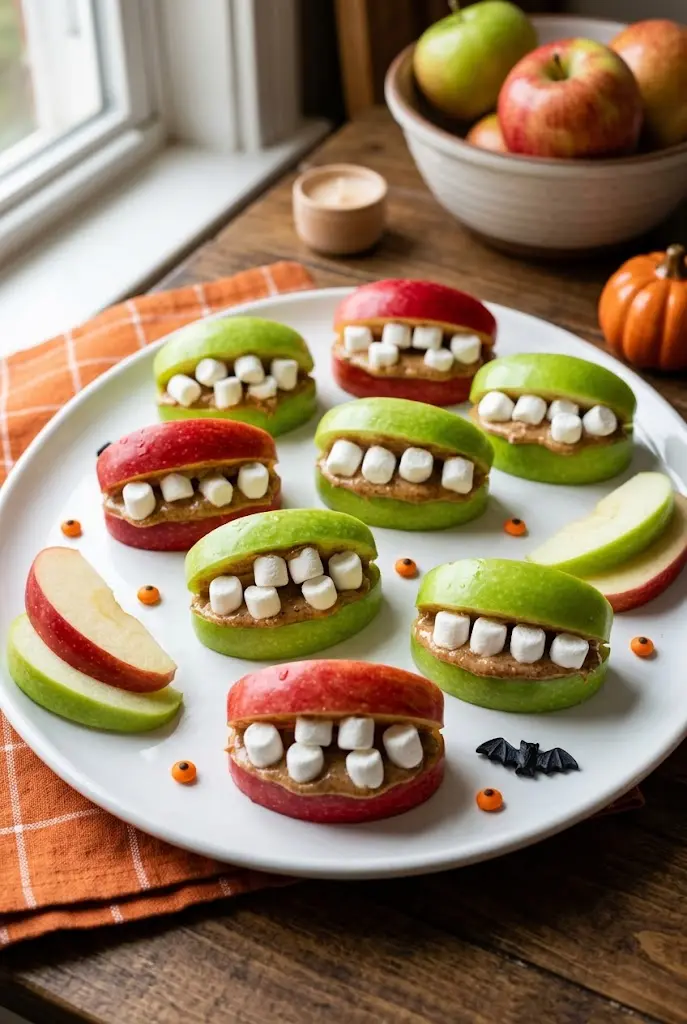
Prep time: 15 minutes Makes: 8 monster mouths
Ingredients
- 2 large apples
- ¼ cup creamy peanut butter
- 16 mini marshmallows
- 1 teaspoon lemon juice, optional
- 2 tablespoons sunflower seed butter as an alternative to peanut butter
How to Make
- Wash and core the apples.
- Cut them into 16 thick wedges.
- If desired, lightly toss the cut surfaces with lemon juice to slow browning.
- Spread peanut butter or sunflower seed butter on one side of eight apple wedges.
- Arrange two mini marshmallows along the edge of each wedge to resemble teeth.
- Top with the remaining apple wedges, with the filling and marshmallows between them, to form little mouths.
- Arrange on a platter and serve promptly.
Tips for Success
- Use firm apples so the mouths hold their shape.
- Slice the apples into similar-sized wedges for easier assembly.
- Use sunflower seed butter for a peanut-free variation, while checking all ingredient labels for allergen safety.
- Assemble shortly before serving for the freshest appearance.
16. Pumpkin-Shaped Chocolate Truffles
Chocolate truffles are rich, bite-sized desserts that can be shaped into miniature pumpkins for Halloween. A simple chocolate filling and orange candy coating create a festive appearance without needing intricate decorating techniques.
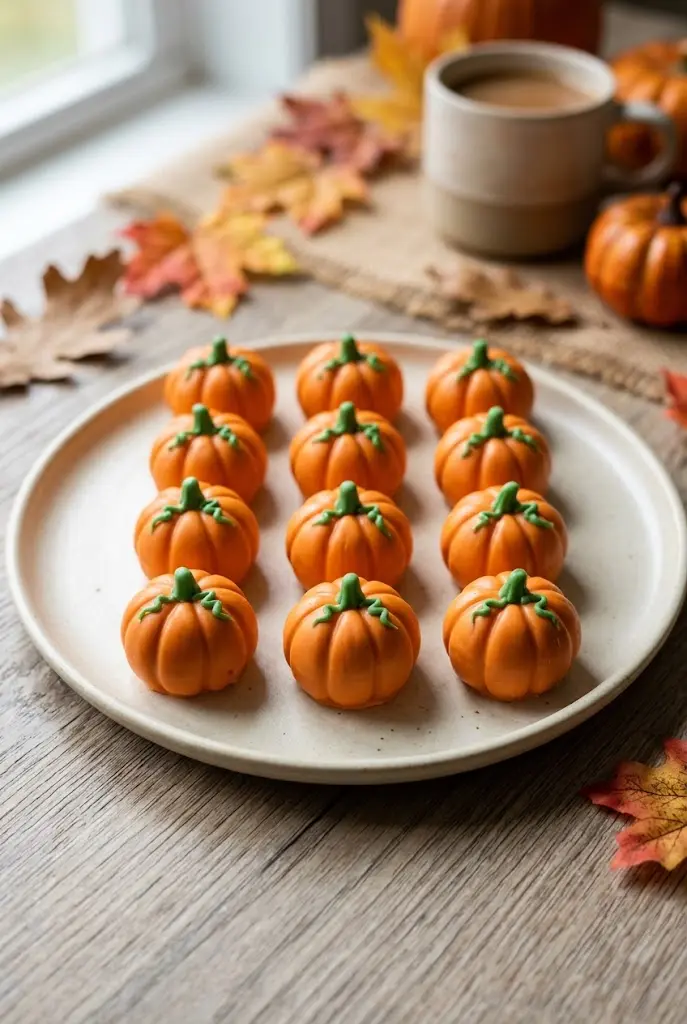
Prep time: 25 minutes Chilling time: 1–2 hours Makes: 12 truffles
Ingredients
- 8 ounces semi-sweet chocolate, finely chopped
- ½ cup heavy cream
- 8 ounces orange candy melts
- Green candy melts or small green candy pieces for stems
- 1 teaspoon butter, optional
How to Make
- Place the chopped chocolate in a heat-safe bowl.
- Warm the cream until steaming but not boiling, then pour it over the chocolate.
- Let it stand for 2–3 minutes before stirring until smooth. Add butter if desired.
- Refrigerate the mixture until firm enough to shape.
- Roll into 12 small balls and gently shape them into pumpkins.
- Use a toothpick to make shallow vertical grooves around each truffle.
- Chill the shaped truffles until firm.
- Melt the orange candy coating and dip each truffle.
- Add a tiny green candy stem before the coating sets.
- Refrigerate as needed until ready to serve.
Tips for Success
- If the filling becomes too soft while shaping, return it to the refrigerator.
- Use a fork or dipping tool to lift each truffle from the coating.
- Keep the grooves shallow so the filling doesn’t break apart.
- Because the filling contains cream, store the truffles refrigerated and follow safe food-handling practices.
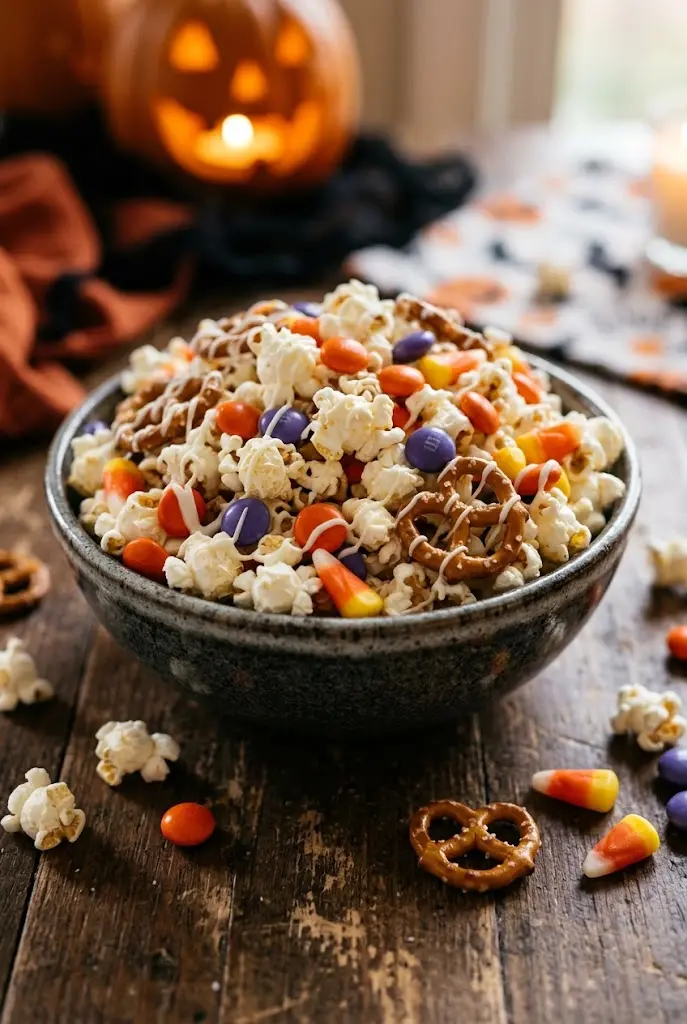
17. Halloween Popcorn Mix
Halloween popcorn mix is an easy party snack that balances salty popcorn with sweet candies and colorful chocolate drizzle. It’s a practical option for movie nights, classroom events, and treat bags.
Prep time: 15 minutes Setting time: 15 minutes Makes: About 8 cups
Ingredients
- 6 cups popped popcorn
- 1 cup candy corn
- ½ cup Halloween-colored candy-coated chocolates
- ½ cup mini pretzels
- ½ cup orange or white candy melts
- 2 tablespoons Halloween sprinkles
How to Make
- Remove any unpopped kernels from the popcorn.
- Spread the popcorn and mini pretzels on a parchment-lined baking sheet.
- Sprinkle the candy corn and candy-coated chocolates evenly over the mixture.
- Melt the candy coating according to the package directions.
- Drizzle it over the popcorn mixture.
- Add Halloween sprinkles before the coating hardens.
- Let the mix set, then gently break apart any large clusters.
- Transfer to a large bowl or individual snack bags.
Tips for Success
- Use plain or lightly salted popcorn so the candy toppings don’t become overwhelming.
- Let the popcorn cool before adding the melted coating.
- For a chocolate version, use semi-sweet chocolate instead of colored candy melts.
- Keep the mix in an airtight container and avoid humidity to preserve its crunch.
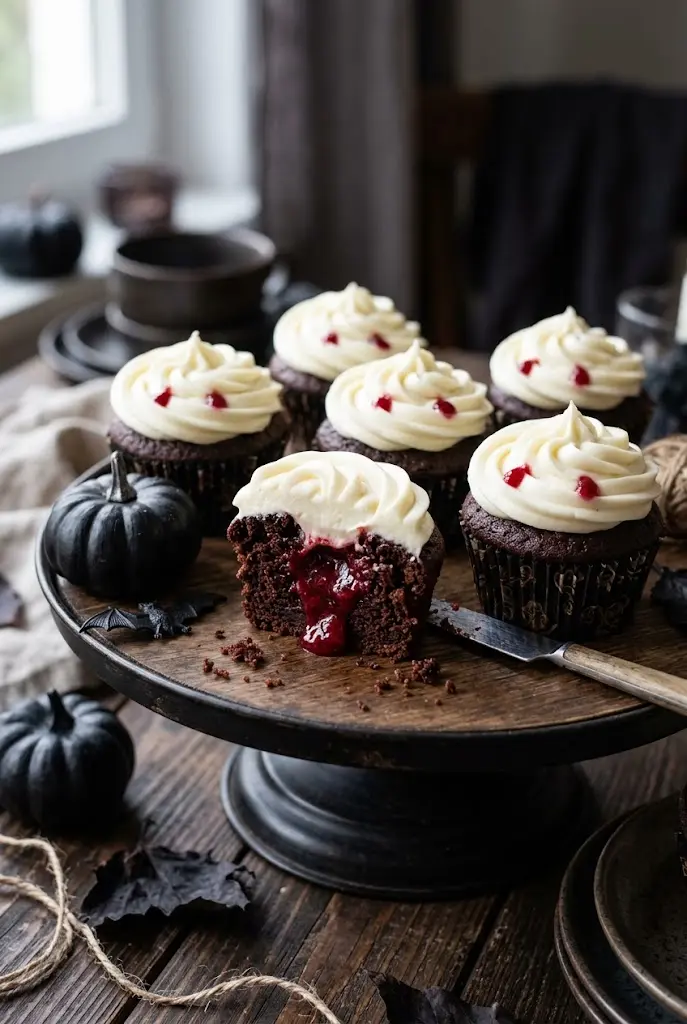
18. Vampire Bite Cupcakes
Vampire bite cupcakes combine rich chocolate cupcakes with red jam filling and simple frosting decorations. The result is a spooky dessert that feels a little more elaborate than a regular cupcake but remains achievable with a boxed mix and ready-made frosting.
Prep time: 25 minutes Baking time: 18–22 minutes, depending on the recipe Makes: 12 cupcakes
Ingredients
- 1 box chocolate cake mix, plus ingredients listed on the package
- 1 cup vanilla or white frosting
- ¼ cup seedless raspberry or strawberry jam
- 12 small red candy decorations, optional
- 1–2 tablespoons milk, if needed to adjust frosting consistency
How to Make
- Preheat the oven according to the cake mix instructions.
- Prepare the batter and divide it among 12 lined muffin cups.
- Bake according to the package directions, then cool completely.
- Use a small knife or cupcake corer to remove a little cake from the center of each cupcake.
- Fill each opening with a small spoonful of jam.
- Replace a small piece of cake over the filling if desired.
- Pipe or spread white frosting on top.
- Add two tiny dots of raspberry jam near the frosting edge to resemble vampire bite marks.
Tips for Success
- Wait until the cupcakes are fully cooled before adding frosting.
- Use a small amount of filling to prevent the jam from spilling out.
- A piping bag makes the frosting look neat, but a spoon works for a casual finish.
- Keep the cupcakes refrigerated if required by your frosting or filling ingredients.
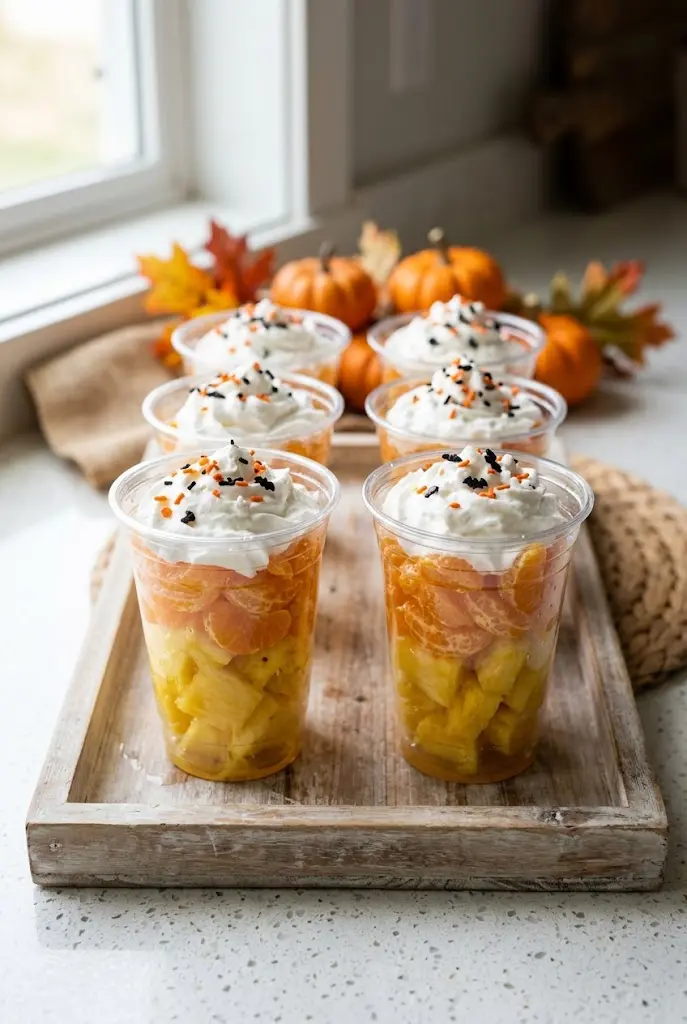
19. Candy Corn Fruit Cups
Candy corn fruit cups are a bright, simple option for a Halloween party. Layers of pineapple, mandarin oranges, and whipped topping mimic the familiar candy corn color pattern, creating a festive dessert with fresh fruit.
Prep time: 15 minutes Chilling time: 15 minutes Makes: 6 cups
Ingredients
- 2 cups pineapple chunks, drained if canned
- 2 cups mandarin orange segments, drained if canned
- 1 cup whipped topping
- 6 small clear dessert cups
- Candy corn pieces, optional for garnish
How to Make
- Prepare the fruit, draining any excess liquid.
- Spoon pineapple into the bottom of each clear cup.
- Add a layer of mandarin orange segments.
- Top with a swirl of whipped topping.
- Add one candy corn piece on top if desired.
- Chill until serving time.
Tips for Success
- Use clear cups so the yellow and orange layers remain visible.
- Drain canned fruit well to prevent liquid from pooling at the bottom.
- Add whipped topping shortly before serving for the best appearance.
- Keep refrigerated and serve promptly.
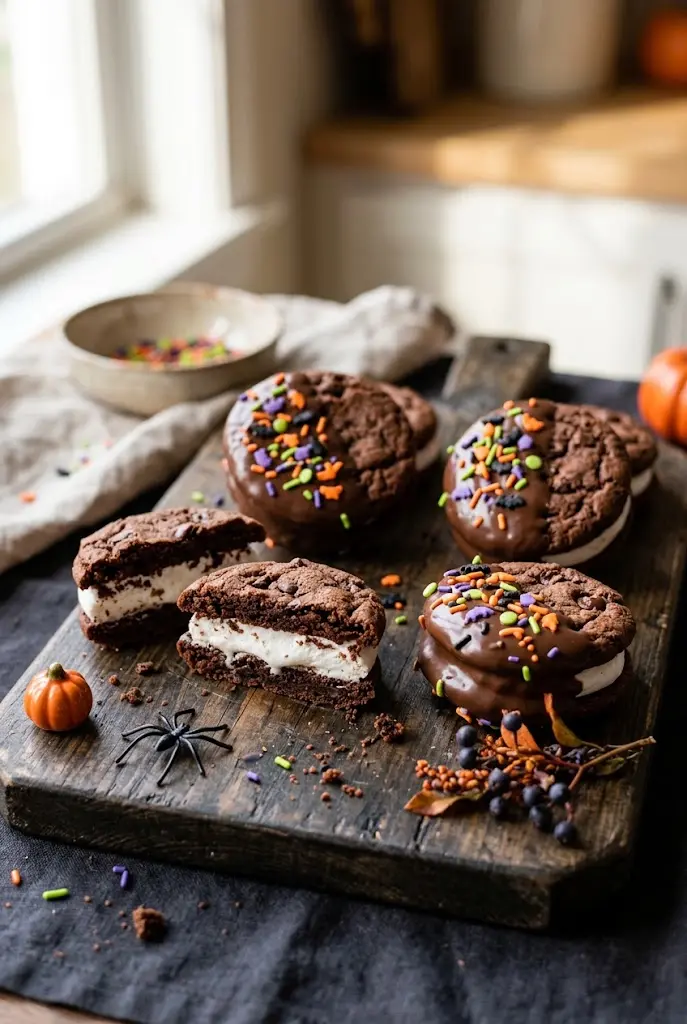
20. Halloween Chocolate-Dipped Marshmallow Sandwiches
These chocolate-dipped marshmallow sandwiches are a fun final addition to a Halloween dessert spread. Sandwich a marshmallow between two chocolate cookies, dip part of the sandwich in melted chocolate, and finish with colorful sprinkles.
Prep time: 20 minutes Setting time: 20 minutes Makes: 12 sandwiches
Ingredients
- 24 small round chocolate cookies
- 12 large marshmallows, cut in half horizontally if thick
- 8 ounces semi-sweet chocolate melting wafers
- ¼ cup Halloween sprinkles
- 2 tablespoons orange or purple candy melts, optional
How to Make
- Line a tray with parchment paper.
- Place a marshmallow piece on the flat side of 12 cookies.
- Top each marshmallow with another cookie, pressing gently to create a sandwich.
- Melt the semi-sweet chocolate according to the package instructions.
- Dip each sandwich halfway into the chocolate, or spoon chocolate over the top.
- Add Halloween sprinkles before the coating sets.
- If desired, drizzle with orange or purple candy coating.
- Place on parchment and let the chocolate harden completely.
Tips for Success
- Choose sturdy cookies that won’t crumble when pressed together.
- If the sandwiches slide apart, chill them briefly before dipping.
- Use contrasting sprinkles to make the chocolate coating stand out.
- Store in an airtight container in a cool, dry place.